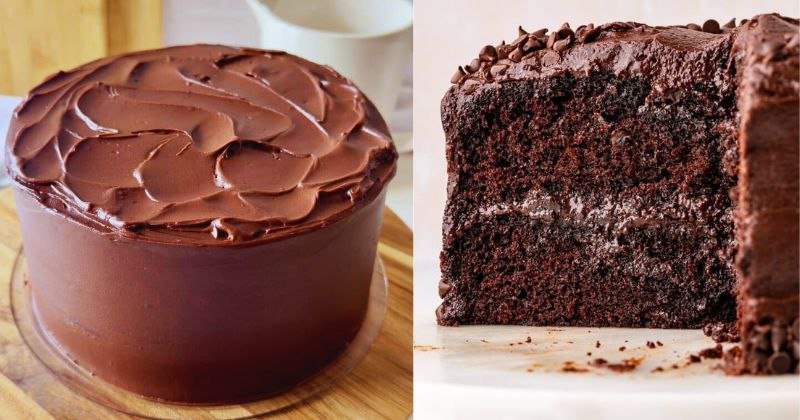
Let me tell you a secret: I’m completely obsessed with recreating iconic movie moments in my kitchen, and this Matilda cake is pure magic on a plate. You know the scene – that towering chocolate masterpiece that Bruce Bogtrotter devoured in defiant triumph? This homemade Matilda cake captures every bit of that rebellious, chocolate-loving spirit while being surprisingly achievable in your own kitchen. I’ve spent countless hours perfecting this recipe, and I can honestly say it’s become my go-to celebration cake that never fails to make people’s eyes light up with pure childhood joy.
This isn’t just any chocolate cake – it’s a statement piece, a conversation starter, and quite possibly the most satisfying dessert you’ll ever make. The rich, moist chocolate layers paired with that glossy, decadent frosting create a culinary experience that’s both nostalgic and absolutely spectacular.
Table of Contents
Why This Recipe Is Everything
• Multiple layers of chocolate perfection – We’re talking about a cake that delivers chocolate intensity in every single bite, with a crumb so tender it practically melts on your tongue • Foolproof technique that guarantees success – Even if you’re not a seasoned baker, this recipe guides you through each step with precision that ensures bakery-quality results every time • Impressive presentation magic – This towering beauty commands attention at any gathering, making you look like a culinary genius while being surprisingly straightforward to execute • Nostalgic flavor profile that hits different – There’s something deeply satisfying about that classic chocolate-on-chocolate combination that takes you straight back to the pure joy of childhood birthday parties
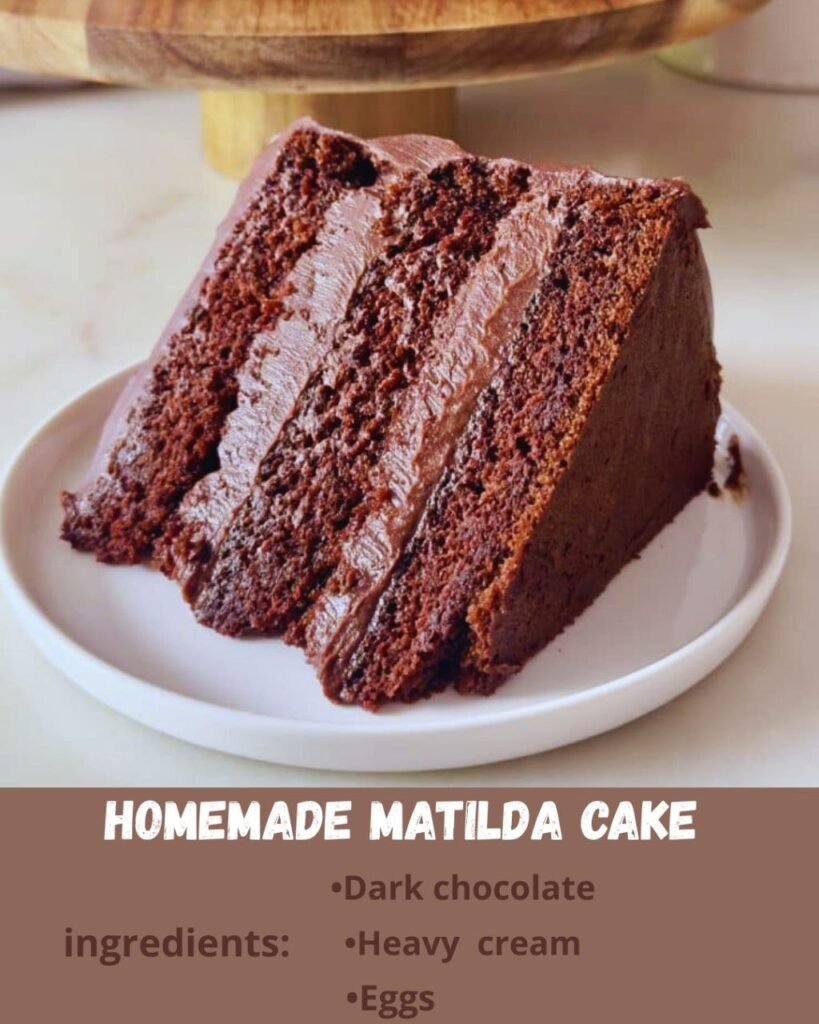
Key Ingredients That Make the Magic
All-Purpose Flour (3 cups): The foundation of our cake structure, providing just enough gluten development to create that perfect tender crumb without being tough. I always sift mine twice for the silkiest texture.
Unsweetened Cocoa Powder (¾ cup): This is where the deep chocolate flavor begins. Dutch-processed cocoa gives you that rich, dark color and intense flavor that makes this cake sing. Don’t substitute with hot chocolate mix – trust me on this one.
Granulated Sugar (2 cups): Beyond sweetness, sugar creates moisture and helps achieve that coveted tender crumb. The crystalline structure actually helps trap air during mixing, contributing to the cake’s light texture.
Large Eggs (3): Our binding agents and moisture contributors. Room temperature eggs incorporate more easily and create better emulsion, which translates to a more uniform, tender cake structure.
Vegetable Oil (1 cup): The secret to keeping this cake incredibly moist for days. Unlike butter, oil stays liquid at room temperature, maintaining that soft, tender texture that makes each bite absolutely divine.
Buttermilk (1 cup): This acidic ingredient reacts with our leavening agents to create lift while adding a subtle tang that balances all that rich chocolate. No buttermilk? Add a tablespoon of lemon juice to regular milk and let it sit for 5 minutes.
Hot Coffee (1 cup): Don’t worry – you won’t taste coffee in the finished cake. Instead, it amplifies the chocolate flavor in the most incredible way, creating depth and richness that’s absolutely magical.
Dark Chocolate (12 oz for frosting): We’re going all-in with quality chocolate for our frosting. Look for something in the 60-70% cacao range for that perfect balance of richness and sweetness.
Heavy Cream (1 cup for ganache): Creates that glossy, mirror-like finish that makes this cake look like it came straight from a professional bakery.
Step-by-Step Instructions
- Prepare your workspace like a pro (15 minutes): Preheat your oven to 350°F and position racks in the center. Grease three 9-inch round cake pans with butter, then dust with cocoa powder instead of flour – this prevents those tell-tale white spots on your finished cake. Line the bottoms with parchment paper for foolproof release.
- Create your dry ingredient foundation (5 minutes): In a large bowl, whisk together flour, cocoa powder, sugar, baking powder, baking soda, and salt. I like to use a fine-mesh sieve to eliminate any lumps – this extra step ensures your batter will be silky smooth.
- Build your wet ingredient mixture (8 minutes): In a separate bowl, whisk eggs until they’re well combined, then add oil, buttermilk, and vanilla. The key here is gradual incorporation – don’t just dump everything together. This creates a better emulsion that translates to superior cake texture.
- Combine with the magic touch (10 minutes): Pour your wet ingredients into the dry ingredients and mix until just combined. Here’s where patience pays off – overmixing develops gluten and creates tough cake. Now slowly add that hot coffee while mixing gently. The batter will be quite thin, which might feel wrong, but this is exactly what creates that incredibly moist texture.
- Divide and conquer (5 minutes): Divide batter evenly between your prepared pans. I use a kitchen scale for precision, but eyeballing works too. Give each pan a gentle tap on the counter to release air bubbles.
- Bake to perfection (25-30 minutes): Bake until a toothpick inserted in the center comes out with just a few moist crumbs. Don’t overbake – these cakes continue cooking slightly as they cool. The tops should spring back lightly when touched.
- Cool with intention (45 minutes): Let cakes cool in pans for 10 minutes, then turn out onto wire racks. This prevents soggy bottoms while avoiding the tragedy of broken layers.
- Create your ganache masterpiece (20 minutes): Heat cream until steaming, then pour over chopped chocolate. Let it sit for 2 minutes, then whisk from the center outward until glossy and smooth. This technique prevents the ganache from breaking and creates that mirror-like finish.
- Assembly magic (30 minutes): Once completely cool, level your cake layers with a serrated knife. Place first layer on serving plate, spread ganache evenly, repeat with remaining layers. Pour remaining ganache over the top, letting it drip down the sides naturally for that professional look.
Pro Tips for Perfect Results
• Don’t skimp on quality chocolate – This cake is a chocolate showcase, so invest in good cocoa powder and chocolate. The difference in flavor will absolutely blow your mind.
• Let the coffee cool slightly before adding – Boiling coffee can cook the eggs in your batter, creating an unpleasant texture. Aim for hot but not scalding.
• Room temperature ingredients are non-negotiable – Cold ingredients don’t emulsify properly, leading to dense, uneven texture. Take everything out about an hour before baking.
• Level those layers for professional results – Uneven layers create unstable, lopsided cakes. A cake leveler or long serrated knife makes this foolproof.
• Patience with the ganache – Let it cool to spreadable consistency rather than rushing. Warm ganache will slide right off your cake, creating a gorgeous mess.
• Chill between frosting steps – A quick 15-minute refrigerator break between layers helps everything set properly and makes the final coating much easier to apply.
Serving Suggestions
• Classic vanilla bean ice cream – The cold, creamy contrast against rich chocolate creates the perfect temperature and texture balance
• Fresh raspberry compote – Tart berries cut through all that chocolate richness while adding beautiful color contrast
• Whipped cream with a hint of espresso – Doubles down on the coffee undertones while lightening each decadent bite
• Candied orange peel – Citrus and chocolate are a match made in heaven, plus it adds elegant visual appeal
• Sea salt flakes – A light sprinkle enhances the chocolate flavor and adds sophisticated complexity
• Pair with bold red wine – A rich Cabernet Sauvignon or Port complements the intense chocolate beautifully for adult celebrations
Nutritional Benefits
While this is definitely an indulgent treat, dark chocolate and cocoa provide antioxidants and can boost mood – perfect for celebrations! The eggs contribute protein, and you can easily adapt this recipe by substituting applesauce for half the oil to reduce calories without sacrificing that incredible moist texture.
For those with dietary restrictions, this cake adapts beautifully – substitute plant-based milk and flax eggs for a vegan version that’s equally spectacular.
Frequently Asked Questions
Can I make this cake ahead of time? Absolutely! The unfrosted cake layers actually improve after a day, becoming more moist and flavorful. Wrap tightly in plastic wrap and store at room temperature for up to 2 days, or freeze for up to 3 months. The ganache can be made up to a week ahead and gently reheated before use.
What if I don’t have buttermilk? No problem! Add 1 tablespoon of white vinegar or lemon juice to 1 cup of regular milk and let it sit for 5 minutes. This creates the same acidic reaction that makes the cake tender and gives it that subtle tang.
Why is my ganache grainy? This usually happens when the cream is too hot or the mixture is stirred too vigorously. Make sure your cream is steaming but not boiling, and stir gently from the center outward. If it does break, try whisking in a tablespoon of room temperature cream.
How do I store leftover cake? Cover with a cake dome or loose plastic wrap and store at room temperature for up to 4 days. The ganache actually helps preserve moisture, so this cake stays incredibly fresh. For longer storage, refrigerate up to a week, but let it come to room temperature before serving for the best texture.
This Matilda cake isn’t just dessert – it’s an experience, a memory maker, and honestly, a little bit of edible magic. Every time I make it, I’m transported back to that triumphant moment when Bruce conquered Miss Trunchbull’s challenge, and I promise you’ll feel that same sense of delicious victory when you take your first bite. So go ahead, channel your inner rebel, and create something absolutely extraordinary in your kitchen. Your taste buds (and anyone lucky enough to share this with you) will thank you for it!