I’m completely obsessed with desserts that make people actually gasp when you cut into them, and this chocolate lava cake is my ultimate culinary love affair with indulgence. Let me tell you, there’s nothing quite like watching someone’s face light up when that warm, molten chocolate center flows out like liquid heaven onto the plate. I discovered the perfect technique for this restaurant-quality chocolate lava cake during my quest to master desserts that look impossibly elegant but are surprisingly achievable at home. This recipe delivers that magical moment every single time – crispy edges, perfectly set exterior, and a center that flows like pure chocolate silk to surprise your taste buds with every spoonful.
Prep Time: 15 minutes
Cook Time: 12-14 minutes
Total Time: 30 minutes
Servings: 4 individual cakes
Table of Contents
Why This Recipe Is Everything
• Perfect molten center magic: The timing and technique create that ideal contrast between set cake exterior and flowing chocolate interior that makes this dessert absolutely legendary • Rich, intense chocolate flavor: High-quality dark chocolate and butter create an incredibly luxurious taste that’s pure decadence without being overwhelming or cloying • Impressive presentation perfection: These individual cakes look like they came from a five-star restaurant but require no special equipment or advanced pastry skills • Make-ahead friendly genius: You can prep these beauties hours in advance and pop them in the oven when dessert time arrives – perfect for entertaining without stress
Key Ingredients That Make the Magic
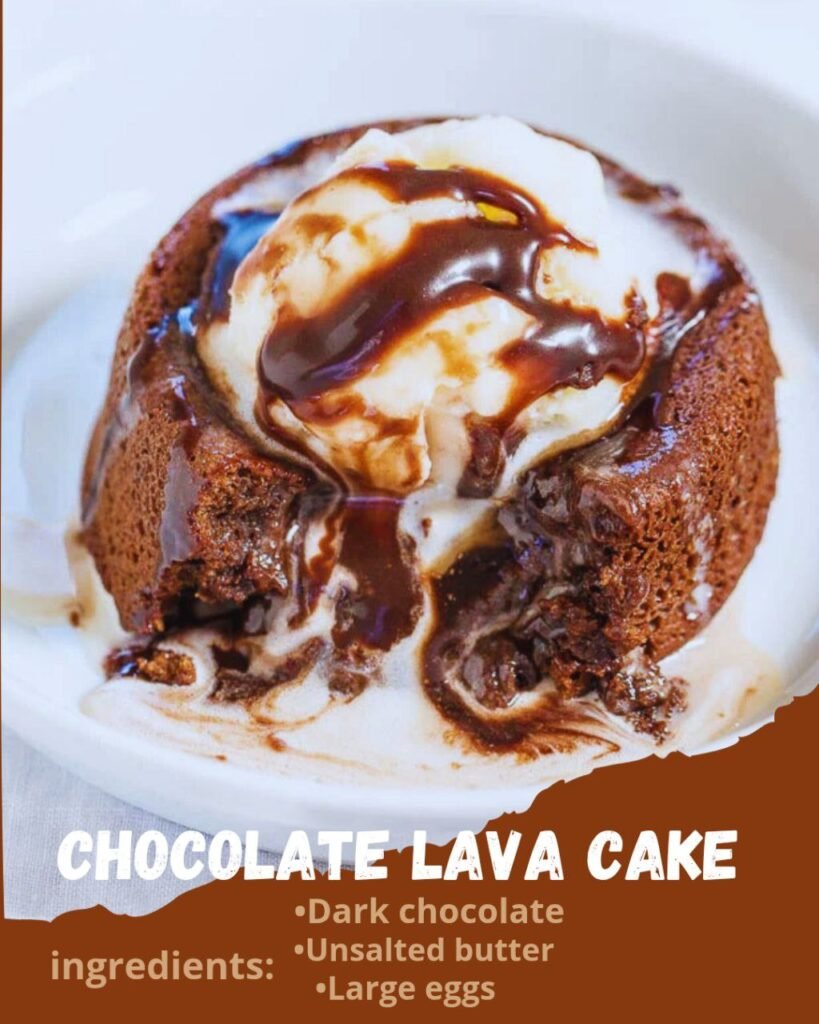
Dark Chocolate (6 oz, 70% cocoa): The star ingredient that creates that incredible molten center and rich flavor foundation. Choose high-quality chocolate – this isn’t the time to skimp since it’s the dominant flavor.
Unsalted Butter (6 tablespoons): Rich, creamy fat that creates the silky texture and helps achieve that perfect flowing consistency. European-style butter adds extra richness if you can find it.
Large Eggs (2 whole eggs plus 2 egg yolks): Essential structure builders that help the exterior set while keeping the center molten. The extra yolks add richness and help create that perfect texture contrast.
Granulated Sugar (1/4 cup): Just enough sweetness to balance the dark chocolate without masking its complex flavor. The amount is perfect for letting the chocolate shine through.
All-Purpose Flour (2 tablespoons): Minimal flour that provides just enough structure to hold the cake together while allowing that molten center to flow freely.
Vanilla Extract (1 teaspoon): Enhances the chocolate flavor and adds aromatic depth that makes everything taste more luxurious and well-rounded.
Salt (Pinch): The secret ingredient that intensifies the chocolate flavor and balances all the sweetness perfectly – never skip this crucial element.
Butter for Ramekins (2 tablespoons, softened): Essential for easy release and preventing sticking. This step is non-negotiable for perfect presentation.
Cocoa Powder for Dusting: Creates a professional finish and adds extra chocolate flavor while preventing sticking. Dutch-process cocoa works best here.
Step-by-Step Instructions
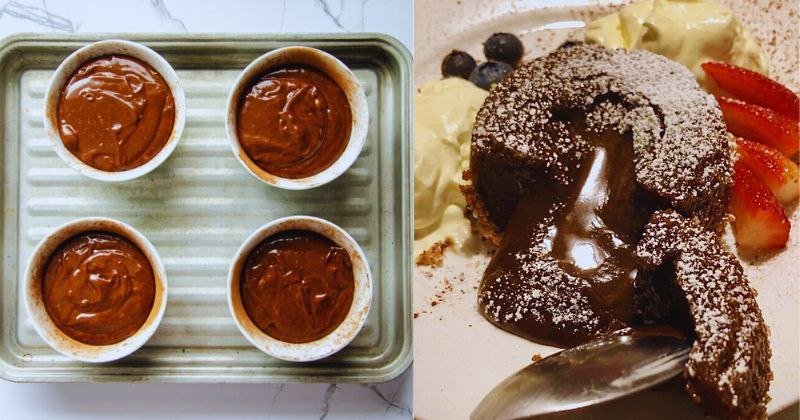
- Prep your ramekins like a pro (5 minutes): Generously butter four 6-ounce ramekins, making sure to get into all the corners and up the sides. Dust with cocoa powder, tapping out excess. This double protection ensures your cakes release perfectly every single time.
- Create the chocolate-butter base (8 minutes): In a double boiler or microwave-safe bowl, melt the chocolate and butter together, stirring every 30 seconds if microwaving. The mixture should be smooth and glossy – this is your flavor foundation, so take your time to get it perfectly smooth.
- Build the batter with precision (5 minutes): In a medium bowl, whisk the whole eggs, egg yolks, and sugar until pale and slightly thickened, about 2-3 minutes of vigorous whisking. This creates the structure that holds everything together while maintaining that molten center.
- Combine with finesse (3 minutes): Gradually whisk the warm chocolate mixture into the egg mixture – go slowly to prevent the eggs from scrambling. Add vanilla and salt, then gently fold in the flour just until combined. Don’t overmix – we want tender cake, not tough results.
- Fill and chill strategically (15 minutes minimum): Divide the batter evenly among prepared ramekins, filling them about 3/4 full. Cover with plastic wrap and refrigerate for at least 15 minutes or up to 4 hours. This chilling step is crucial for achieving that perfect molten center.
- Preheat for success (10 minutes before baking): Preheat your oven to 425°F and place a baking sheet on the center rack. The high temperature creates that set exterior while keeping the center molten – it’s all about the temperature contrast.
- Bake to perfection (12-14 minutes): Place ramekins on the hot baking sheet and bake for 12-14 minutes until the edges are firm and set but the centers still jiggle slightly when gently shaken. This timing is everything – watch them like a hawk during the last few minutes.
- The grand finale (2 minutes): Let rest for 1 minute, then run a knife around the edges to loosen. Place a serving plate upside down over each ramekin, flip quickly and confidently, then tap gently and lift the ramekin. The cake should release perfectly with that gorgeous dome shape intact.
Pro Tips for Perfect Results
• Don’t skimp on the chocolate quality: This dessert is only as good as your chocolate, so invest in something you’d actually enjoy eating on its own. 70% cocoa content hits that perfect sweet-bitter balance.
• Let the batter chill completely: That refrigeration time allows the batter to set up properly, which is essential for achieving the molten center without the cake falling apart.
• Watch the timing like a hawk: The difference between perfect molten center and overcooked cake is literally 1-2 minutes. Set a timer and don’t walk away during those final moments.
• Test your oven temperature: Use an oven thermometer to ensure accuracy. Too hot and the outside burns before the inside sets; too cool and you won’t get that perfect contrast.
• Prep everything in advance: Have your serving plates ready and positioned before you flip. Once these come out of the oven, you want to move quickly for the best results.
• Serve immediately for maximum impact: The molten center is at its peak flow right after inverting. Don’t let them sit around – the magic happens in those first few moments.
Serving Suggestions
• Vanilla Bean Ice Cream: The cold, creamy contrast against the warm, molten chocolate creates pure dessert perfection • Fresh Raspberry Coulis: Bright, tart berries cut through the richness and add beautiful color contrast to the plate • Lightly Sweetened Whipped Cream: Fluffy, airy cream provides textural contrast and helps balance the intense chocolate flavor • Candied Orange Zest: Citrusy brightness that complements chocolate beautifully and adds an elegant finishing touch • Salted Caramel Drizzle: Rich, buttery sweetness with a hint of salt that creates an incredible flavor combination • Port or Dessert Wine: Sweet, fortified wines pair beautifully with dark chocolate and enhance the luxurious feel
Nutritional Benefits
While chocolate lava cake is definitely an indulgent treat, dark chocolate does offer some surprising health benefits. The 70% cocoa chocolate provides antioxidants called flavonoids that support heart health and may help improve brain function. Dark chocolate also contains minerals like iron, magnesium, and zinc.
For those with dietary restrictions, this recipe can be adapted – use gluten-free flour for celiac-friendly version, or try dairy-free chocolate and vegan butter substitutes for plant-based diets. You can also reduce the sugar slightly if you prefer less sweetness, though this may affect the texture slightly.
Frequently Asked Questions
Can I make these ahead of time? Absolutely! The unbaked filled ramekins can be covered and refrigerated for up to 4 hours, or even frozen for up to 2 weeks. If frozen, add an extra 2-3 minutes to the baking time. This make-ahead quality makes them perfect for dinner parties.
What if my center isn’t molten enough? If you cut into your cake and the center is too set, reduce the baking time by 1-2 minutes next time. Remember, the center should still jiggle slightly when you gently shake the ramekin before removing from the oven.
Can I use a different size ramekin? The recipe is calibrated for 6-ounce ramekins. Smaller ramekins will need less baking time (8-10 minutes), while larger ones need more (15-18 minutes). Adjust accordingly and watch for that slight jiggle in the center.
What if my cake sticks to the ramekin? This usually happens when the ramekins aren’t properly buttered and dusted. Make sure to coat every surface thoroughly, and let the cake rest for exactly 1 minute after baking before inverting – not longer or shorter.
This chocolate lava cake recipe has become my go-to showstopper dessert when I want to create that magical dining moment that people remember forever. The combination of restaurant-quality presentation and surprisingly simple technique makes it absolutely perfect for impressing guests or treating yourself to something truly special. Trust me, once you master this technique, you’ll have a dessert superpower that never fails to amaze. Give it a try and prepare to become everyone’s favorite dessert magician!