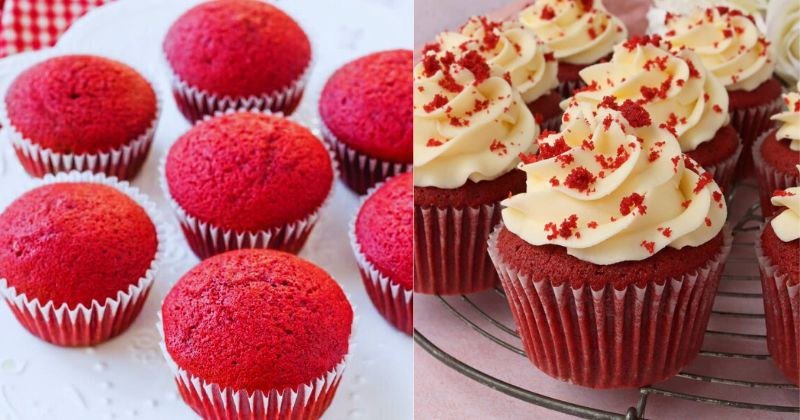
Let me tell you a secret: I’m absolutely obsessed with these Red Velvet Crush Cupcakes, and once you taste them, you’ll understand why they’ve become my latest culinary love affair. There’s something utterly magical about the way these ruby-red beauties combine that signature tangy sweetness with an incredibly moist crumb that practically melts on your tongue. These aren’t just any red velvet cupcakes – they’re the kind that make people stop mid-conversation and ask for the recipe. I’ve been perfecting this formula for years, and I can confidently say these Red Velvet Crush Cupcakes deliver restaurant-quality taste right in your own kitchen.
Prep Time: 20 minutes
Bake Time: 18-22 minutes
Total Time: 45 minutes
Yield: 12 standard cupcakes
Table of Contents
Why This Recipe Is Everything
- Perfect moisture balance: The combination of buttermilk and oil creates that signature tender crumb that red velvet is famous for, while the vinegar adds just enough tang to make your taste buds dance
- Foolproof color magic: My technique ensures that gorgeous deep red hue without relying on an entire bottle of food coloring – it’s all about the chemistry between cocoa and acid
- Cream cheese frosting perfection: This isn’t your average frosting – it’s a cloud of tangy sweetness that complements the cake’s subtle chocolate notes without overwhelming them
- Make-ahead friendly: These beauties actually taste better the next day, making them perfect for parties and special occasions when you want to surprise your guests
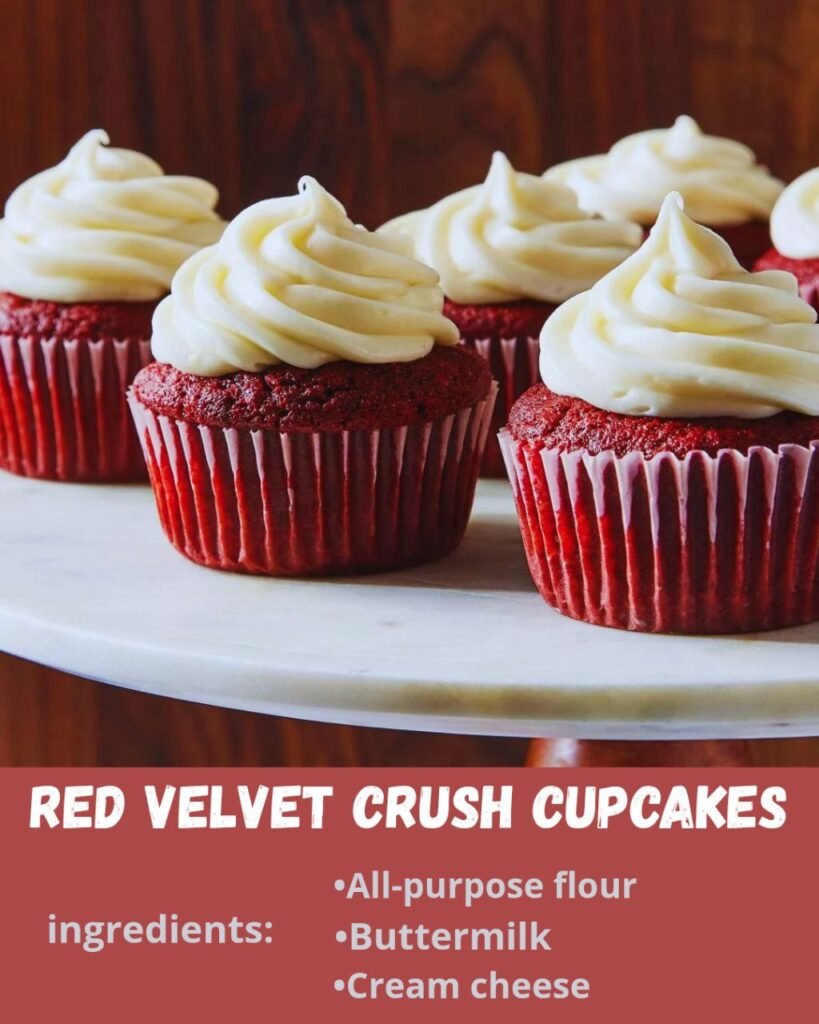
Key Ingredients That Make the Magic
All-Purpose Flour: The foundation of our tender crumb, providing just enough structure without making the cupcakes heavy or dense
Unsweetened Cocoa Powder: Here’s where the magic happens – just a tablespoon gives that subtle chocolate flavor and helps activate the red color when combined with the acid. Don’t skip this or substitute with chocolate powder!
Buttermilk: This is absolutely everything for red velvet. The acidity reacts with the baking soda for lift and creates that signature tangy flavor. No buttermilk? Make your own by adding 1 tablespoon white vinegar to regular milk and letting it sit for 5 minutes.
Red Food Coloring: I use gel food coloring for the most vibrant results without thinning the batter. Liquid works too, but you’ll need more and it might affect the texture slightly.
White Vinegar: This little addition might seem strange, but it’s crucial for that classic red velvet tang and helps activate the leavening agents for the perfect rise.
Vegetable Oil: Unlike butter, oil keeps these cupcakes incredibly moist for days. Trust me on this one – it’s the secret to that bakery-style texture.
Cream Cheese: For the frosting, use full-fat cream cheese at room temperature. Light versions just won’t give you that rich, tangy flavor we’re after.
Vanilla Extract: Pure vanilla is worth the investment here – it adds depth to both the cake and frosting that imitation just can’t match.
Step-by-Step Instructions
- Preheat and prep (5 minutes): Set your oven to 350°F and line a 12-cup muffin tin with cupcake liners. I always recommend using paper liners rather than just greasing – it makes for easier removal and prettier presentation.
- Mix the dry ingredients (2 minutes): In a medium bowl, whisk together 1½ cups all-purpose flour, 1 tablespoon unsweetened cocoa powder, 1 teaspoon baking soda, and ½ teaspoon salt. Make sure there are no lumps – this ensures even distribution throughout your batter.
- Create the wet mixture (3 minutes): In a large bowl, whisk together 1 cup granulated sugar, ½ cup vegetable oil, 1 large egg (room temperature works best), 1 teaspoon vanilla extract, 1 tablespoon red food coloring, and 1 teaspoon white vinegar. The mixture should be smooth and vibrant red.
- Alternate wet and dry (5 minutes): This is where technique matters! Add the flour mixture to the wet ingredients in three additions, alternating with ½ cup buttermilk in two additions. Start and end with flour. Mix just until combined after each addition – overmixing will make tough cupcakes, and we definitely don’t want that.
- Fill and bake (20 minutes): Divide batter evenly among cupcake liners, filling each about 2/3 full. This prevents overflow while ensuring full, domed tops. Bake for 18-22 minutes, or until a toothpick inserted in the center comes out with just a few moist crumbs. Don’t overbake – these should feel springy when lightly touched.
- Cool completely (30 minutes): Let cupcakes cool in the pan for 5 minutes, then transfer to a wire rack. This step is crucial – frosting warm cupcakes will result in a melty mess, and nobody wants that.
- Make the cream cheese frosting (10 minutes): Beat 8 oz room temperature cream cheese until light and fluffy. Gradually add 4 cups powdered sugar, ¼ cup softened butter, and 1 teaspoon vanilla. Beat until smooth and pipeable – about 3-4 minutes of mixing creates the perfect consistency.
- Frost and serve: Pipe or spread frosting generously on cooled cupcakes. I love using a star tip for that bakery-style swirl, but a simple spread with an offset spatula works beautifully too.
Pro Tips for Perfect Results
- Don’t skimp on room temperature ingredients: Cold eggs and buttermilk can cause the batter to curdle, affecting the final texture. Take them out 30 minutes before baking for best results.
- Let the red food coloring develop: Mix the wet ingredients and let them sit for 2-3 minutes before combining with flour. This allows the color to fully develop and distribute evenly.
- Test your oven temperature: Red velvet is sensitive to temperature variations. An oven thermometer ensures accurate baking – too hot and they’ll dome excessively, too cool and they won’t rise properly.
- The toothpick test is everything: Look for moist crumbs, not wet batter, when testing for doneness. Completely clean toothpicks usually mean overbaked cupcakes.
- Chill your frosted cupcakes: Let them sit in the refrigerator for 15 minutes after frosting. This sets the frosting beautifully and makes them easier to transport.
- Storage magic: Store unfrosted cupcakes wrapped tightly for up to 3 days, or freeze for up to 3 months. Frosted cupcakes keep covered in the refrigerator for up to 5 days.
Serving Suggestions
These Red Velvet Crush Cupcakes are perfect for so many occasions:
- Valentine’s Day celebrations with extra red sprinkles and heart decorations
- Birthday parties paired with vanilla ice cream and fresh berries
- Holiday gatherings alongside coffee or spiced cider
- Wedding showers with elegant white chocolate curls on top
- Casual weekend treats with a tall glass of cold milk
- Potluck desserts that will have everyone asking for your secret
For an extra special presentation, try dusting with cocoa powder, adding fresh raspberries, or drizzling with white chocolate ganache.
Nutritional Benefits
While these are definitely an indulgent treat, red velvet cupcakes do offer some surprising nutritional elements. The buttermilk provides probiotics and calcium, while the small amount of cocoa delivers antioxidants. The key is enjoying them as part of a balanced approach to eating – sometimes you need that perfect bite of sweet, tangy bliss to make life a little more delicious.
For lighter versions, you can substitute applesauce for half the oil, or use a sugar substitute designed for baking, though the texture will be slightly different from the original.
Frequently Asked Questions
Why didn’t my cupcakes turn out red enough? This usually comes down to food coloring quantity or type. Gel coloring gives the most vibrant results. Also, make sure your cocoa powder isn’t Dutch-processed, as it won’t react the same way with the acid to enhance the red color.
Can I make these ahead of time? Absolutely! Unfrosted cupcakes can be made up to 3 days in advance and stored covered at room temperature. You can also freeze them for up to 3 months. The frosting can be made 2 days ahead and stored in the refrigerator – just re-whip it briefly before using.
My frosting turned out too soft – help! This usually happens when the cream cheese or butter was too warm, or if you added the powdered sugar too quickly. Chill the frosting for 30 minutes, then re-whip it. If it’s still soft, gradually beat in more powdered sugar until you reach the right consistency.
What’s the difference between red velvet and regular chocolate cupcakes? Red velvet has a much more subtle chocolate flavor, thanks to the small amount of cocoa powder. The real stars are the tangy buttermilk and vinegar, which create that signature flavor profile. The cream cheese frosting is also traditional and essential to authentic red velvet.
These Red Velvet Crush Cupcakes are more than just a dessert – they’re a celebration in cupcake form. Whether you’re baking for a special occasion or just because you deserve something wonderful, this recipe delivers that perfect combination of nostalgia and pure deliciousness. Go ahead, give them a try, and prepare to fall in love with every single bite.